Creating a garage wiring diagram might feel daunting at first, but you can manage it easily with the right approach. Understanding your power requirements is crucial to start—most residential homes come with service ratings between 100 to 200 Amps for the entire house.
Your garage’s specific needs will vary significantly based on how you plan to use the space. A 60-amp subpanel usually works well for a simple garage that’s used to park cars. You’ll need at least a 100-amp subpanel if you’re setting up a workshop with power tools or planning to install EV charging. The electrical codes updated in 2017 now require all attached garages to have at least one 20-amp circuit for receptacles. This piece will help you explore simple garage wiring diagram approaches and practical garage electrical solutions that create a safe, functional space meeting both code requirements and your specific needs.
Planning Your Garage Wiring Setup
Your garage electrical project’s success starts well before you touch any tools. You need a solid plan that aligns with your goals and objectives.
Decide how you’ll use the garage
The way you’ll use your garage shapes its electrical requirements. Do you see it as a workshop for power tools, a storage space with appliances, or maybe a living area? Each use just needs different electrical setup. A workshop calls for outlets that can handle table saws and drill presses. Storage spaces might need power for washers, dryers, and freezers. The number of people using the space also affects how much power you’ll use.
Estimate your power needs
Today’s homes typically come with electrical service between 100-200 amps for the whole house. Check if your main panel can take on extra circuits before adding them to your garage. A 20-amp service might be enough for simple garage needs like lights, door openers, and handheld tools. Standard household garages usually take about 50 amps. Workshops with multiple power tools or climate control might need 100 amps.
To get a full picture of your electrical usage:
- Make a list of all garage devices
- Look up each tool or appliance’s power needs
- Check what types of outlets you’ll need (20-amp receptacles are standard)
- Leave room for future additions
Sketch a simple garage wiring diagram
After figuring out your power needs, draw up a detailed wiring plan. Show where you want outlets, lights, switches, and circuit breakers. Put an outlet in the ceiling’s center for garage door openers. Large machines work best with outlets at 3 feet. Space your outlets 3-5 feet apart throughout the garage.
Note that attached garages must have at least one 20-amp circuit for receptacles—this rule came into effect in 2017. You might want to add extra outlets above work areas if you plan to use power tools often.
Choosing the Right Power Supply
Choosing the right power supply remains a crucial decision for your garage electrical project. Your power needs, budget, and plans will determine the best choice.
Using your home’s main panel
The simplest solution often involves connecting directly to your home’s main panel, especially with minimal power requirements. This setup works perfectly for garages that need simple lighting and a few outlets. A dedicated circuit from your main panel can power your garage’s electrical needs.
Your existing panel’s available capacity limits this option. Current electrical codes require at least one 20-amp circuit for receptacles in attached garages. This direct connection works best if you use your garage mainly for parking and storage rather than as a workshop.
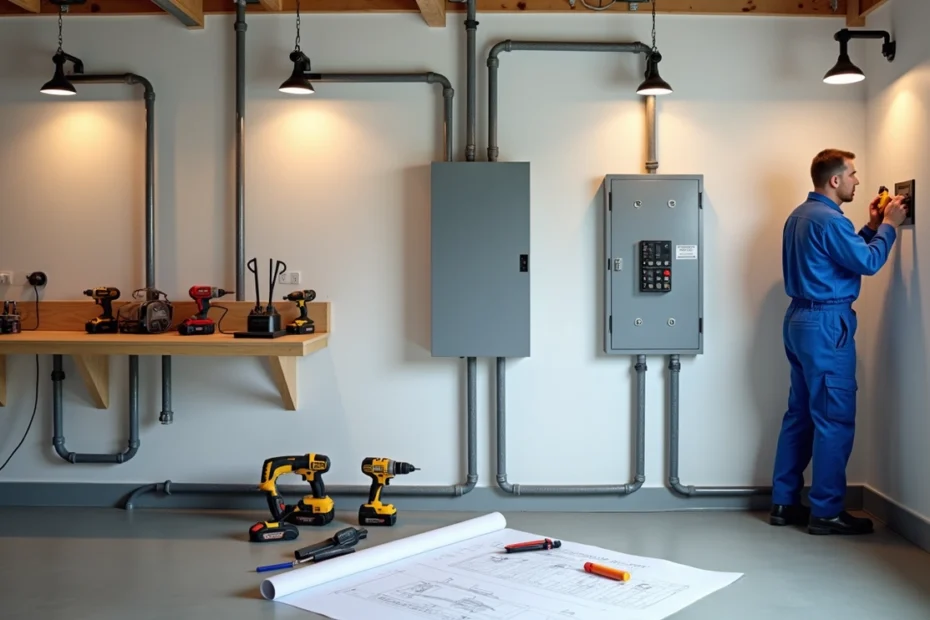
Installing a subpanel in the garage
A subpanel creates a mini distribution center that offers greater flexibility and capacity for your garage wiring diagram. A 60-amp subpanel proves enough for small garages with simple lighting and outlets. You might need at least a 100-amp subpanel if you plan a workshop with power tools or EV charging.
The subpanel installation requires a feeder line from your main panel to the garage. Proper grounding becomes essential, usually with ground rods driven into the earth near the subpanel. Multiple circuits through the subpanel make it easier to organize your garage’s electrical layout and handle future expansions.
When to think about a separate utility line
A dedicated service line directly from the utility company makes sense in specific situations. This option, also called an “appurtenant service”, proves especially valuable when:
- Your home’s main panel lacks sufficient capacity
- The garage sits detached with difficult wire access
- You need substantial power for a workshop or EV charging
A separate utility service typically provides a 200-amp service line, offering enough capacity for even the most demanding garage electrical setups. Note that minimum monthly fees might apply, and your utility company’s policies could include commercial rates.
The separate utility line eliminates worries about overloading your home’s electrical system. This option offers maximum flexibility for future garage electrical projects, despite its complex initial setup.
Laying Out Outlets, Lights, and Circuits
A functional garage electrical system needs strategically placed outlets, lights, and circuits as its foundation. The right layout will give a convenient and code-compliant space that maximizes usability.
Where to place outlets for tools and appliances
Each garage needs at least one receptacle outlet per vehicle bay, which should not exceed 5½ feet above the floor. This setup will give electric vehicles their charging points. Your workbench area should have outlets right above the work surface. Building an extended workbench with multiple outlets makes sense if you plan to use power tools.
Outlets for freezers or washers work best at 3 feet high. Your garage door opener needs its own dedicated outlet in the ceiling’s center. A good rule is to space outlets 3-5 feet apart throughout the garage. This spacing lets you access power from anywhere.
Lighting options for work and safety
The best garage lighting combines ambient illumination with task-specific fixtures. Your garage’s square footage helps determine the needed lighting:
- 300 lumens per square foot in areas where detailed work happens
- 50-75 lumens per square foot serves ambient or accent lighting needs
Workshop areas need daylight bulbs (5000K+) that show colors accurately, with a CRI rating of 85 or higher. LED shop lights save energy and light up instantly. Strip lighting works well in garages with high ceilings, while wraparound lights suit lower ceilings better.
How many circuits do you need?
NEC rules state that attached garages need at least one 20-amp circuit for receptacles. This circuit can only power receptacles in multi-bay garages—not lights or other devices. Single-car garages can share lighting and receptacle circuits, but larger garages need separate circuits.
Heavy-duty tools should have their own circuits to avoid overload. You can safely connect up to 10 outlets per circuit for high-wattage loads or 15 outlets for low-wattage uses.
GFCI and AFCI requirements
Every garage receptacle must have Ground Fault Circuit Interrupter (GFCI) protection. These devices keep you safe by detecting ground faults and cutting power quickly. You can use either GFCI circuit breakers or GFCI receptacles.
Garages differ from living spaces as they don’t need Arc Fault Circuit Interrupter (AFCI) protection. Most electrical codes don’t require AFCIs in garage areas, though they protect against fire-causing arc faults.
Height and spacing rules for receptacles
The National Electrical Code sets clear height requirements for garage receptacles:
- Vehicle bay receptacles: maximum 5½ feet above the floor
- Outdoor receptacles: maximum 6½ feet above grade level
- Workbench receptacles: typically 48 inches from the floor
These receptacles must be tamper-resistant (TR) and weather-resistant (WR) when used outdoors. No point along the wall should be more than 6 feet from an outlet.
Safety, Grounding, and Code Compliance

Safe garage electrical installations depend on proper grounding and code compliance. These elements are the foundations of your garage wiring diagram’s safety features.
Understanding Ufer ground and ground rods
A Ufer ground (concrete-encased electrode) delivers better grounding through the concrete foundation’s rebar. Concrete’s conductive properties create an excellent path to earth. New construction requires a 4 AWG copper wire to connect to the rebar, and inspection access must remain available. Two ground rods serve as an alternative when a Ufer ground isn’t possible. These rods need at least 6 feet of separation.
Protecting exposed wiring
Your garage’s exposed non-metallic sheathed cable (NM-B/Romex) needs protection from physical damage. Cables should stay at least 1-1/4 inches away from wood framing members’ edges. Nail plates protect cables that pass through studs at depths less than this. NM cables need securing every 4-1/2 feet and within 12 inches of boxes. Horizontal wiring below 8 feet needs extra protection because damage risks are higher.
Permit and inspection requirements
Local authorities require permits for major electrical work. Nobody should cover trench-installed wiring before inspection. Your local permitting office can explain specific rules. Some areas let homeowners install limited outlets without permits, while others require licensed contractors.
Common mistakes to avoid
Electrical mistakes happen when people mix up GFCI line/load connections, skip junction boxes, hide them behind drywall, cut wires too short, or forget ground fault protection. Every 125-volt 15- and 20-amp receptacle in garages must have tamper resistance, unless specific exceptions apply.
Conclusion
Garage wiring might seem intimidating, but the project becomes manageable when you break it down into simple steps. This piece walks you through everything from simple power needs to important safety measures that your garage’s electrical setup needs.
Note that your garage’s electrical requirements depend on how you plan to use the space. A basic parking spot won’t need as much power as a workshop filled with power tools or EV charging stations. Whatever your needs, the planning phase remains crucial to the whole project.
Electrical systems demand unwavering attention to safety. GFCI protection, proper grounding, and code compliance keep your property and family safe. These rules exist with good reason, too – ignored electrical hazards can lead to serious injuries or damage your property.
The wiring approaches outlined here will help you build an electrical system that works now and adapts to future needs. Smart outlet placement, proper lighting, and adequate circuits can turn a simple garage into a space that truly works for you.
Local permit requirements need your attention before any electrical work begins. You should think about hiring a professional electrician if any part of the installation makes you unsure. A properly wired garage gives you both peace of mind and functionality.
This knowledge helps you plan your garage’s electrical project with confidence, whether you need a few outlets or want to build a detailed workshop power system. Your garage needs the same careful electrical planning as the rest of your home.